How to Make Gluten-Free Biscuits
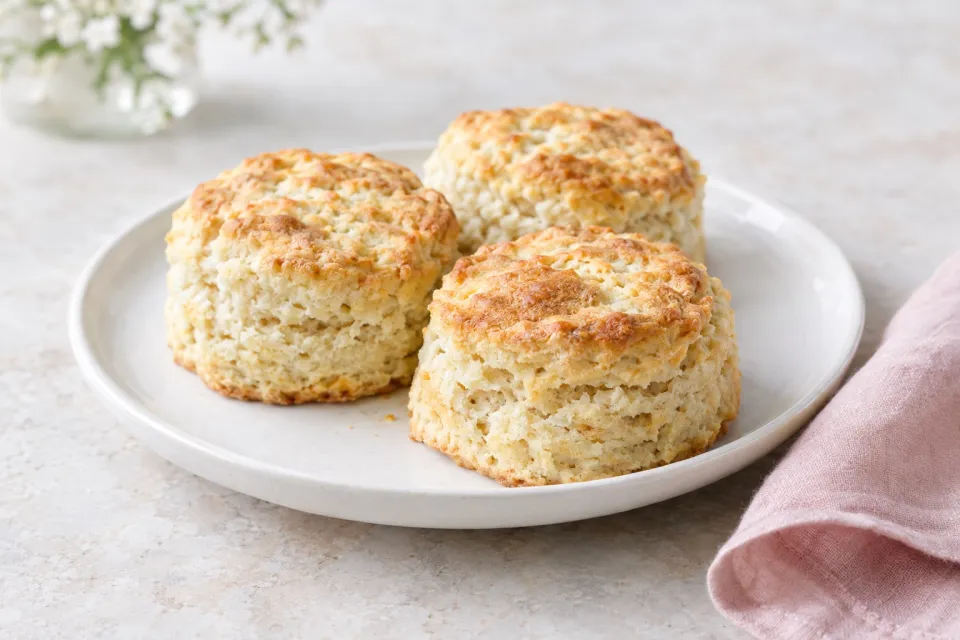
Tender gluten-free buttermilk biscuits with buttery layers, baked close together for a taller, cozy-from-the-oven bite.
Prep 25 min · Cook 25 min · Total 1 hr 55 min · Makes 8 biscuits
Ingredients
- 2 cups gluten-free flour mix, preferably Bob's Red Mill 1-to-1 Gluten-Free Baking Blend or another flour blend with xanthan gum
- 1 tablespoon baking powder
- 3/4 teaspoon baking soda
- 2 tablespoons sugar
- 1/2 teaspoon salt
- 1/2 cup very cold butter, cut into tablespoons and then cut in half, plus more to grease the pan
- 3/4 to 1 cup cup cold buttermilk
- 1 tablespoon melted unsalted butter
Directions
- Add the sugar, salt, baking soda, baking powder, and flour to the bowl of a stand mixer with the paddle in place, and mix to combine. Add the cold butter and run the mixer on low until the butter is broken into smaller bits, about 1 minute. Pause and take a look: you should still see pieces roughly the size of marbles, or even a touch larger, and they should look a little flattened. Don’t take the mixture all the way down to tiny pea-sized crumbs. If a few butter pieces are still too chunky, pinch them between your fingers to flatten them slightly; dime-sized pieces are just right.
- Lift the bowl off the mixer and add 2 tablespoons of buttermilk. Use a fork to quickly work the liquid through the flour mixture so it starts to hydrate. Gradually stir in a scant 3/4 cup of buttermilk with the fork, mixing just until the floury streaks disappear. If it still looks too dry, add more buttermilk 1 tablespoon at a time, mixing it in before deciding whether you need more. You’re aiming for dough that comes together, not dough that feels wet.
- Tip the dough onto a floured work surface; it may look very crumbly at first. Start gathering and shaping it into a ball, and it will pull together. If the dough truly feels dry because of things like room humidity or thicker buttermilk, work in a couple of tablespoons of buttermilk to moisten the dry spots.
- Pat the dough, or roll it with a floured rolling pin, into a thick rectangle about 4 inches by 6 inches. Fold one short side toward the center, then fold the other short side over it, as though folding a letter. Turn the dough 1/4 turn, roll it out again, and fold it into thirds once more. Do the same fold-and-roll process 1 more time, then cover the dough in plastic wrap and chill it for 1/2 hour to 1 hour. This folding is what builds the layers; skipping it makes the biscuits bake up flat and dense.
- Heat the oven to 425 degrees F. Coat a 9- or 10-inch cast iron pan, or an 8x8 glass baking dish, with spray oil or butter.
- Take the dough out of the refrigerator and gently roll it with a rolling pin into a rectangle about 6 inches by 9 inches and 1 inch thick. Dip a 2 1/2-inch biscuit cutter lightly in flour, since this dough can be sticky, and cut about 6 biscuits by pressing straight down through the dough. Don’t twist the cutter as you lift it away, or the biscuits won’t rise as well. Gather and reroll the scraps, flouring the cutter again if needed, and continue cutting until you’ve used all the dough. Move the biscuits to the prepared pan. They’ll need to sit close together, and that’s good; touching helps them climb higher. Brush the tops with the melted butter.
- Bake for 20 to 25 minutes, until the tops are lightly browned at the edges. Watch them closely near the end so they don’t burn.
- Take the pan out of the oven and brush the biscuit tops with melted butter. Leave them in the pan for about 5 to 10 minutes, then move them to a wire rack to finish cooling. Try to wait 10 minutes before eating one; they’ll finish setting a bit as they cool, and you’ll spare your mouth. These are best warm from the oven, but they can be reheated in a toaster or a low oven at 300 degrees F for up to 2 days. They do dry out quickly.