Cherry Ice Cream
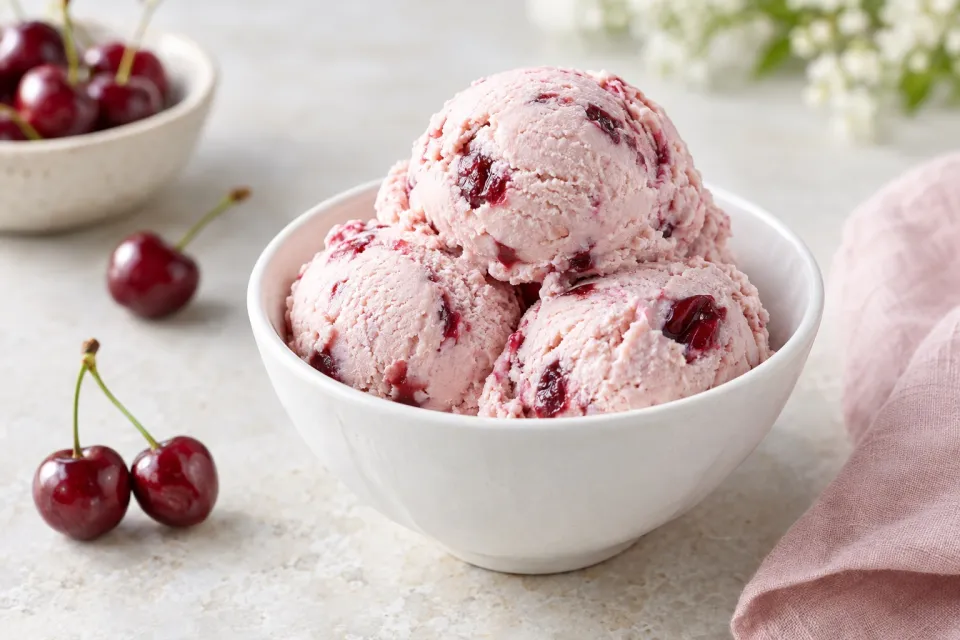
Roasted cherry ice cream folds a bright, jammy fruit concentrate into cream for a scoop with real depth and a little summer drama.
Prep 45 min · Cook 55 min · Total 6 hr 55 min · Makes about 1 quart (8 servings)
Ingredients
- 56 ounces whole cherries, washed and stemmed but not pitted
- 5 1/4 ounces sugar
- 1/8 teaspoon Diamond Crystal kosher salt, or more to taste; for table salt, use about half as much by volume or the same weight
- 14 ounces heavy cream
- 1/2 ounce fresh juice from 1 lemon, or more to taste
Directions
- For oven-roasted cherries, put an oven rack in the center and heat the oven to 450 degrees F. Choose a deep stainless steel 10-inch skillet and stir the cherries and sugar together in it. Roast for about 40 minutes, giving the fruit an occasional stir, until the cherries are soft, slumped, and very juicy.
- For fire-roasted cherries, start 1 chimney full of charcoal. Once the coals are burning and coated in gray ash, dump them onto the grate and spread them evenly across half of the coal grate. If you’re grilling with gas instead, turn half the burners to high heat. Put the cooking grate on, close the grill, and let it warm for 5 minutes. Scrub the grate clean and oil it. In a deep stainless steel 10-inch skillet or a large, well-seasoned cast iron pan, stir together the cherries and sugar; avoid new or poorly seasoned cast iron, since the acidic fruit can pick up a metallic taste. Place the skillet on the hot side of the grill, cover, and cook, stirring now and then, until the cherries have softened, collapsed, and released plenty of juice. If they start to scorch, slide the skillet to the cooler side of the grill and keep cooking there. Grill heat is never shy about having opinions, so check the fruit often because the timing will vary.
- Let the cherries cool until you can handle them, then gently squeeze the softened fruit to remove the pits by hand, ideally with food-safe gloves on. Put the pits in a stainless steel saucier or saucepan with a 1-quart capacity, and move the pitted cherries to a slim, high-sided container or into a food processor bowl; leave the roasting juices in the pan for later.
- Pour the cream over the pits, set the pan over medium heat, and bring it just to a simmer; cover it and leave it off to the side. Give the pitted cherries a coarse chop with a few pulses from an immersion blender or food processor, stopping well before they turn into a purée. You only want to break down the bigger pieces so the fruit can release more juice. Scrape the chopped cherries back into the pan with the reserved roasted cherry juices, then bring the mixture to a simmer on the stovetop over medium heat. Cook, stirring often with a heat-resistant spatula, until it seems lightly jammy without looking dry, 5 to 10 minutes depending on how far the cherries roasted.
- Place a medium bowl under a fine-mesh strainer and pour the cherries into it, using a flexible spatula to press the fruit until the liquid is extracted. You should end up with about 20 ounces (565g) of cherry concentrate, plus around 15 ounces (425g) of pulp. If the concentrate measures more than 20 ounces (565g), put it back in the pan and cook it down to 20 ounces; if it falls short, add water until you have 20 ounces total. Spoon the pulp into a clean jar, stir in a pinch of salt, and save it for another use; when refrigerated, that cherry pulp keeps for up to 3 weeks and works like jam.
- Pour the cherry pit-infused cream through a strainer into the reduction, then throw away the pits or save them for cherry pit whipped cream, since they still have flavor to share. Whisk the mixture until it is smooth, then stir in the lemon juice and salt.
- Add ice water several inches deep to a sink compartment or extra-large bowl. Nestle the bowl of ice cream base in the ice bath and stir occasionally until the mixture has cooled, about 30 minutes. Cover it and refrigerate until the base is no warmer than 40 degrees F (4 degrees C), about 4 hours. You can hold the ice cream base in the refrigerator for up to 1 week. Taste and adjust with more salt or lemon juice if you like. Churn it in an ice cream machine following the manufacturer’s directions. While it churns, put a 1-quart container and a flexible spatula in the freezer.
- Once the ice cream looks thick and airy, turn off the machine. Use the cold spatula to transfer the ice cream to the chilled container. Eat it right away as soft-serve, or press plastic wrap directly onto the surface, close the lid, and freeze until the ice cream reaches 0 degrees F, about 4 hours.